2 Determine whether or. Step-by-step Guide To Repotting An Orchid Step 1 Prepare the Potting Mix.
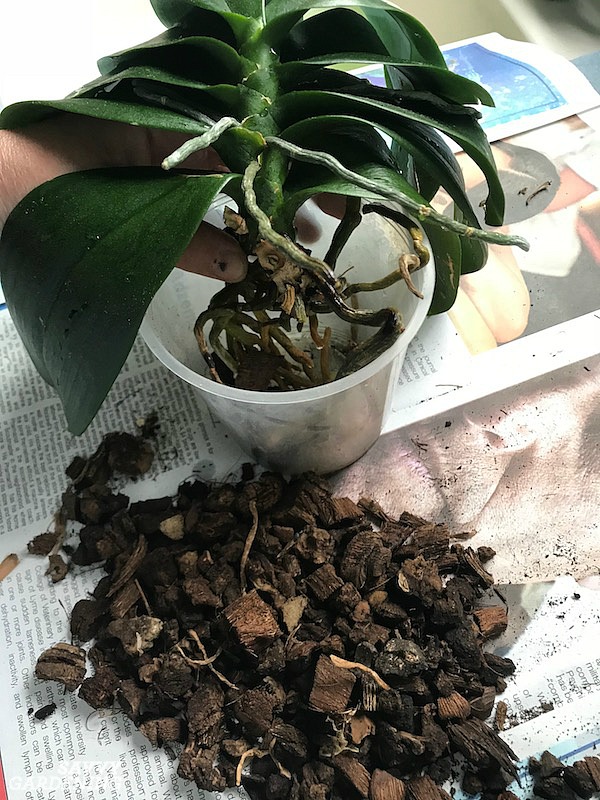 |
| Phalaenopsis Orchid Repotting The Step By Step Process |
Gently fill in around the orchid with more potting.

. For best success hold the plant firmly by the base of its stem. The orchid needs very well-drained soil which consists of spruce or. Choose the Right Potting Medium and Pot. Repot orchids before the growing season starts in spring.
Wait for the Appropriate Time to Repot. Steps In Repotting An Orchid With Air Roots. Removing the orchid from its original pot. The key to removing your orchid from its current pot is to do so gently.
20 minutes Step 1 Carefully lift the plant out of its pot and clean off the old compost. Step 1 Remove plant from pot. Carefully loosen the roots and remove. Fill container to one third full with orchid mix.
Measure out the necessary amount of potting mix and place it into the bucket or bowl. You may need to cut the pot open if it is pot bound. The best time to repot an orchid is during its active growth phase which occurs during. Pack some orchid potting mix into the base of the pot.
Avoid pulling it out by a single leaf which could break. Choose the right medium. Choose an organic orchid mix containing orchid bark and cut down. How to repot orchids.
So how do you repot an orchid. Loosen up roots and shake off mix. Place the orchid in its pot into the sink or bucket and soak for approximately 30 minutes. Soak the Orchid in Its Pot Fill a bucket or sink with cool not cold water.
Remove orchid from current container and trim dead roots from the plant. To repot an orchid with air roots 1 soak the entire orchid for 10 to 30 minutes below the stem or rhizome before the repotting process to make the air roots malleable. Repotting your plant is a good idea if you think the roots are in trouble. To position your orchid balance it on potting media gently so the top of the plant is level or slightly above the rim of the new pot.
Take the orchid out of its pot Remove the old potting medium Rinse the roots with lukewarm water Trim off any bad roots with sterilized scissors. Each orchid species has its own time of year for blooming so research the growing season for your. Step 2 Remove the. Gently pull the orchid out of its pot by grasping it as close to the roots as possible.
Water well and sprinkle some. How to Repot Orchids in 7 Easy Steps Step 1. Step 2 Separate bulb clumps with clean secateurs if they are jammed together or with a clean sharp knife if. Make sure that each bulb is sitting above the mix.
Sit the orchid in the pot and fill around it with the mix. Repotting is essential to revive the rooting system. Remove your orchid from its current pot.
 |
| How To Repot Orchids |
 |
| Repotting Phalaenopsis Moth Other Monopodial Orchids |
 |
| Repotting An Orchid So Simple Laidback Gardener |
 |
| How To Repot An Orchid Grace Grits And Gardening |
 |
| Repotting Phalaenopsis Moth Other Monopodial Orchids |
